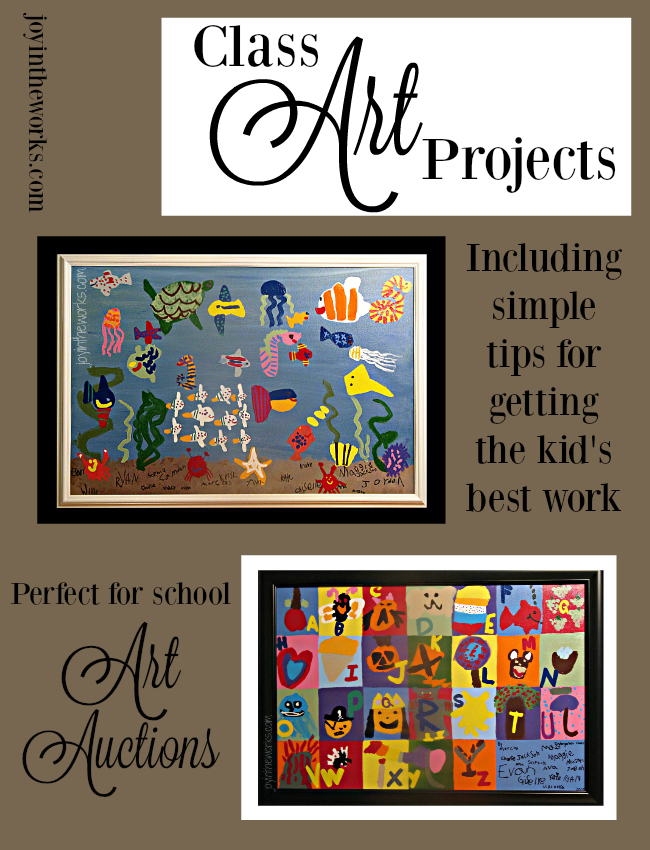
The truth is, while I like crafts, I am not artistic at all. So being in charge of the class art project for the school art auction for my son’s Kindergarten class was a daunting task. There are a million great ideas out there (check out my Class Room Mom board with tons of art project ideas on my Pinterest board), but I needed something simple (especially with a new little one at home) . Check out how we did simple group painting on a canvas with these simple tricks for getting the best work out of the children.
 Whether you are doing a class art project to give as a gift to the teacher or to auction off at the school art auction, you want the kids to do their very best work. If you going to do something like I did with a group art project involving painting a canvas, there are a few tips to keep in mind. If you simply give the children a paintbrush and some paint, you are asking for trouble! =)
Tips for a Class Art Project: Painting a Canvas
1. Pick your theme ahead of time.
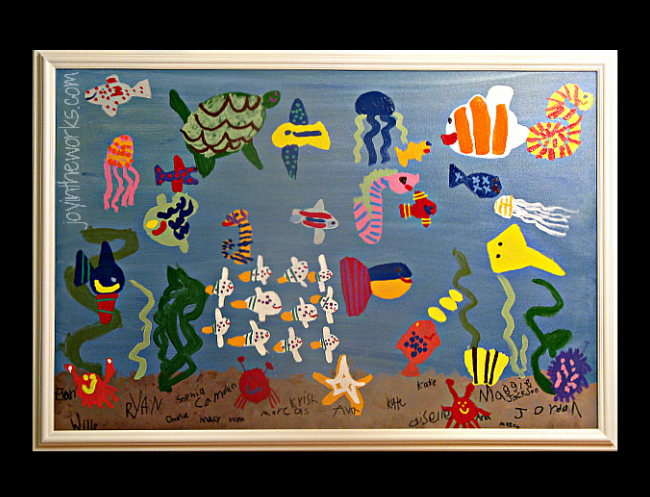
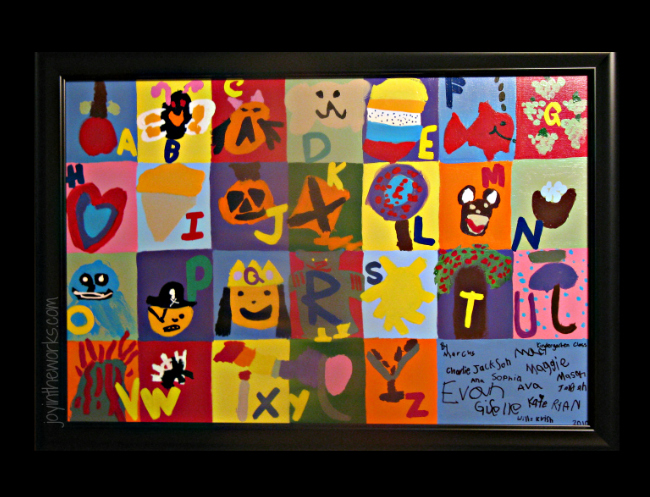
When doing a class painting, I think it is important to think of a theme or scene that gives enough opportunity for each child to contribute equally. I chose an underwater ocean painting because each child could easily paint fish, seaweed or shells separately and it would work well together. Each child can feel ownership over it if they all get to paint an equal part. I had to be a little more creative with the ABC painting when dividing up the letters. You can give the children other jobs however, like painting the background.
2. Work in stages.
Typically you need to set a time with the teacher to go in and work with the kids on a class art project and usually that time is pretty limited. So when you come into the classroom, you need to be as prepared as possible with all the supplies you need and your canvas ready to go. For us, that involved having the background completely painted and ready to go. In fact, if you are doing any sort of layering when painting, you will need to plan on coming back multiple times or plan on doing some of it on your own. I think it’s perfectly acceptable to paint the background on your own (with your own kid’s help!) and still call it the kid’s work! =) For this particular project, I actually lived near enough of the kids in my son’s class that I just had them come over ahead of time to paint the background for me! That way when I got the time to go work with the kids in the class, I didn’t have to worry about the background at all.
3. Bring in samples.
I know there are some people who will disagree with this step as they feel like all artwork should come purely from the children’s imagination and showing examples of work can affect that. However, I feel like when you are doing artwork for a gift or a school art auction, it is a slightly different type of art (especially at the elementary school level). These types of art projects tend to be more “product” art vs “process” art and are supposed to be gallery worthy! ;)
Regardless of your stance on children’s artwork, I really think it helps to bring in some samples to get the children thinking about art. For instance, with the underwater painting, I printed out several simple drawings of fish and sea animals. I took a few minutes to talk with the child about the lines and shapes they saw that might help when painting. We used words like “rainbow lines” for the curve of a fish, a squiggle line for seaweed etc. Then I put the samples away so they weren’t tempted to copy the work! I tell them that they can create what they want, those are just ideas to help get them started brainstorming. I do have them tell me what they are going to paint ahead of time, however, so I don’t have 20 clown fish or whatever the first child chose to paint!

The painting and instruction process was the similiar for the ABC painting. I gave each child a letter or two (picked ahead of time!) and then we brainstormed some words that started with that letter and talked about what might be easiest to paint. I also showed them simple examples as well. But I always put them away before they paint or draw. Doing the ABC painting took a little extra planning as I had to divide up the letters ahead of time and come up simple items the children could paint. But I think it was worth the effort!
 4. Use the right supplies.
As I said before, when you come into the classroom to work with the children, come prepared! This includes the correct brushes and paint! You can’t assume the teacher will have the brush sizes you need (smaller is better!) and it will also take extra time to find them. I also bring in my own wipes and containers to fill with water for cleaning paint brushes. The less you have to bother the teacher, the better (especially if it is a gift for them!). One thing to note about supplies- if you are painting a canvas, be sure to use acrylic paint or something similar. Yes, it stains clothing, but it is better to bring a large t-shirt or a smock to protect the children’s clothing, then to use washable tempera paint on a canvas. Believe me, I have tried it. Tempera paint (or other types of kid paint) just doesn’t cover well and doesn’t look good on a traditional paint canvas. Remember the goal is to showcase the children’s creativity and the right supplies will help that.
5. Smooth out lines and clumps.
Honestly, this is probably the most important step in my mind. When kids are painting with real paint and paint brushes, they don’t know things like smoothing out clumps and applying second coats when you can see through the first one. In the interest of time, you may need to do these things for them. It is still the children’s original artwork even if you have to do a little touch up to make the colors stand out with a second coat or smooth out clumps to help it dry. I think it can be a slippery slope however that you don’t suddenly find yourself “fixing” the children’s painting. Children’s artwork never needs to be fixed and if you have the time, you can teach the children how to do these things themselves. Often with class art projects, however, you get one session in the classroom to get their best work and little touch ups can help!
Bonus Tip:
Just so you learn from my mistakes, I wanted to give you a bonus tip to help get the kid’s best work when doing a class art project like this. Whatever you do, do not let the kids paint with black paint!! I know it is hard to tell because the ABC painting already has poor photo quality (sorry!), but every kid wanted to paint with black for that painting. I found that the black just overtook the painting. I try not to control the kid’s choices or creativity too much, so I let them paint with black because I had it there, but next time I would leave the black at home or at least control their access to it! Kids paint with bolder lines and shapes, so when they paint with black paint, it can end up making their painting indistinguishable. But in the end, I think it turned out well and the kid’s did a fantastic job. I hope my tips help you if you are taking on a class art painting project like this!

Have you ever worked on a class art project like this? Or do you have any other art project ideas that you would be willing to share? Please share in the comments below!

Hi Shannon,
I love the underwater project. I’m curious how you encouraged the kids to pick different sea life and as to how you had them all paint on the same canvas. Is it very large? Did you have to do it on different days so that the next painter didn’t smudge the previous one?
I appreciate your thoughts!
Shira
Hi Shira!
I sent you an email with lots of tips! Let me know if you don’t get it! =)