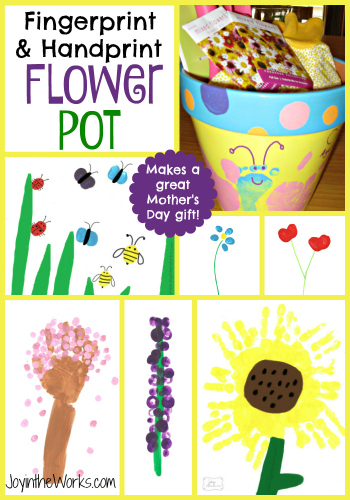
 Spring has sprung and all the sunshine gets me all excited about gardening and being outside. The enthusiasm wears off quickly after I am reminded about my black thumb, so I usually just stick with the spring crafts and gift giving occasions. =)
Mother’s Day is right around the corner and I am always looking for gift ideas that are kid made and personalized. However, sometimes our kids are too little to do much except offer a helping hand (or foot, as the case may be!) =) I have always loved handprint and footprint artwork and think flower pots in the spring time are a great way to show them off. Plus, you can fill them with some colorful garden supplies and it makes a perfect gift for Mother’s Day or any other gift occasion.
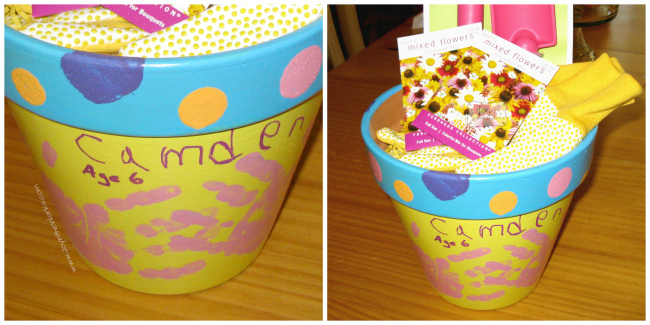
For this project, I did more of the painting and detailed work than I usually do. My 6 year old helped with the yellow and blue base coat, but I did the polka dots on the edging and I ALWAYS smooth out the drips and clumps when we paint together. In a project like this, you don’t want the background to take away from the central focus of the child’s art.
For our fingerprint and handprint painted flower pot, we went with a butterfly design for the first one. There are a variety of ways to make a butterfly out of your child’s prints. Typically, you will see butterflies made up of 2 little footprints and a simple body drawn in between. However, I wanted a design that incorporated both of my children’s prints in one object. Also, since I have a larger age difference between my boys, I had to get creative (since the 6 year old’s feet wouldn’t fit on the flower pot anymore!). I ended up using the baby’s footprint for the body of the butterfly and my 6 year old’s hands for the wings. However, if the butterfly doesn’t suit you, I have included 6 other handprint and fingerprint art ideas to decorate your flower pot gift.
But first, our Butterfly Flower Pot. Here is a close-up of the footprint body:
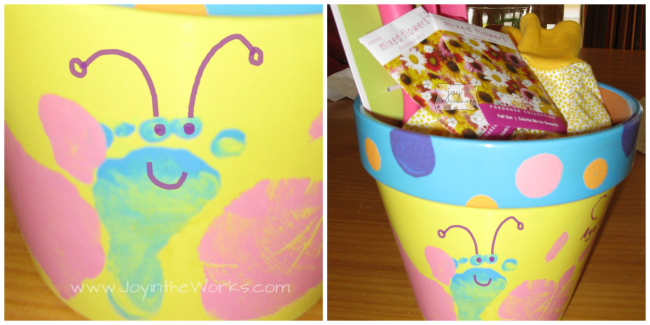 Here is a close-up of the back with the handprint wings:
Supplies Needed:
Flower Pot
Primer (Optional)
Acrylic Paint
Acrylic Paint Pens
Foam Paintbrushes
Paper Plate
Baby Wipes
Clear Polyurethane Spray Paint (or any type of clear sealer)
Hands and Feet
Gardening Supplies or a Plant to Fill the Flower Pot
Steps:
1. Clean the flower pot using a damp rag. If there are any major flaws or rough spots, you can lightly sand the flower pot.
2. While the pot dries, prepare your paints on a paper plate (or any other similar container) with acrylic paint. Honestly, I just use whatever type of acrylics I have on hand, but there are special types made just for terracotta pots that you can find at your local craft store.
3. At this point, some people choose to seal the pot with a primer. Again, I am usually pulling this project together last minute, so unless I have it on hand, I skip it. BUT a primer would help seal the pot, hide any imperfections and give your top coat better coverage.
4. Paint your basecoat(s). If you are going to paint 2 different colors on your pot (like the blue top edge I did), you will have the most success if you tape off the edge before you paint and do it in 2 separate stages. This is a good time to get your child’s help. Remember this is acrylic paint, though and it stains clothes. I try to wash it off hands pretty quickly afterwards as well and it comes off with warm soap and water. As I stated above, I always help finish the paint job by “smoothing” out any drips or clumps of paint. It makes a big difference!
5. After the basecoat is dry and you have decided on your design, take your child’s hand (or foot) and using the foam brush, paint your child’s flat open hand (or foot). Make sure you get complete coverage. Hold your child’s hand firmly as you press it against the flower pot. Rub your finger gently over each of his (or her) fingers and the palm to make sure every surface has made contact and then pull the hand straight up. It is important that you control your child’s hand as you place it down and that you pull it up. That part is often tricky and the kids want to pull it up themselves. That usually causes wiggling and smearing of the print.
6. While you still have a grip on your child’s hand, give him a baby wipe so he can get the majority of the paint off his hand right away. I usually walk my kids to the bathroom still holding their wrists so they don’t put a nice beautiful handprint on the wall!
7. Repeat steps 5 and 6 as many times (or children) as necessary. If your children are old enough, have them write their names and ages with a paint pen, if desired. Some people like to write the date on the bottom of the pot as well. The paint pens are great for adding details as well. My 6 year old drew the face and antennae on the butterfly himself. The alternative design ideas I showed below used paint pens for the extra details.
8. If desired, add polka dots to the top edge of flower pot while the paint pen dries. I used a round sponge brush to dot them on.
9. When all the paint has dried thoroughly (check the bottles for individual instructions), take the pot to a well ventilated area and seal the pot. I use a clear semi-gloss acrylic spray “paint” that covers quickly and easily. Again, follow the directions on can for dry time and amount of coats necessary.
10. Last, fill the pot with whatever you desire. Typically, I like to add cute gardening gloves, fun garden tools (there are some really cute designs out there!) and some flower seed packets. You could also add a gift card to a local plant nursery. Or even just plant a simple flower! Either way, it will be a treasured keepsake for Mother’s Day or any other special occasion!
Other flower pot art ideas using your children’s hands, feet and fingers:
A variety of fingerprint flowers:

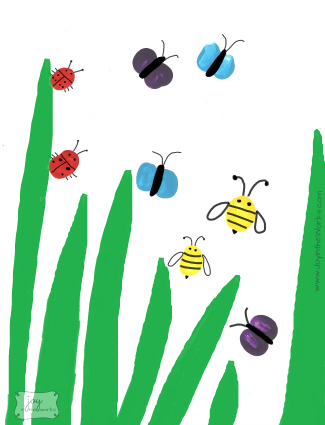
A mix of fingerprint bugs flying and crawling through the grass:
Handprint Sun (with the words “You are My Sunshine”)

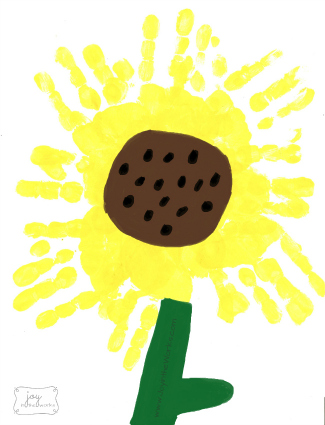
You can also use the same handprint design and have your kids add a dark brown center and seeds to make a sunflower:
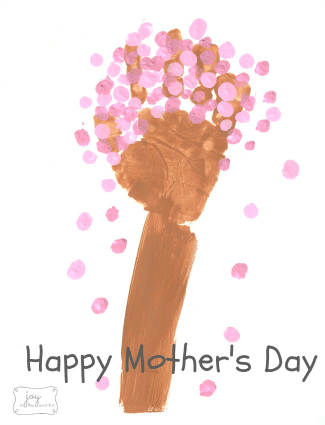
Or use your child’s arm to make a tree trunk, add fingerprint flowers and a sweet Mother’s Day message:
Use 2 upside down handprints to make a handprint heart (Don’t forget the I love Mommy!):

There you have it- a hand painted flower pot with 7 different design ideas that show off your sweet little ones tiny prints! Have any favorite handprint or footprint art ideas? Or some other place to use them? Please share below!

That butterfly on the flowerpot is just adorable! I love the handprints thatmake a heart too. Such great ideas!
Thanks! I love to incorporate kid’s art into gifts for others and I think handprint and footprint art is the perfect way to do that!
So cute! The flow pot with its bright colors is so fun!
Thanks and thanks for checking out my blog! =)
These handprint designs are so fun and perfect for decorating a flower pot. I love handprint crafts they are always so cute and the perfect gift.